Setup Python on your machine
This guide will walk you through downloading, installing, and enjoying Python via the UV package installer and project manager.

Like any language, Python is a collection of ideas for how to communicate. We can’t download and install ideas. But we can download and install a program that follows these ideas to the letter; using them as a strict guide for translating our commands into action. This sort of program is called an interpreter. For brevity we’re going to use “Python” interchangeably to refer to both the language (ideas) and the actual interpreter software that puts those ideas into action. When you encounter phrases like “running Python” you’ll know this actually means running a Python interpreter to make use of the Python language. Let’s get to it.
Juggling pythons
There are many versions of Python. Perhaps your computer shipped with a particular version of Python pre-installed by the manufacturer. This is referred to as your “System Python” because it’s a specific version of Python used by your machine’s operating system, like Apple’s macOS, or a brand of Linux, or Microsoft’s Windows. Because your OS relies on its System Python remaining exactly in its current state (with its specific version, settings, plugins, and so on), we’d like to leave it untouched. Thankfully, it’s easy to install multiple versions of Python alongside each other, keeping them completely separate from one another. (Installing multiple versions of Python is a common practice, and it doesn’t take up much hard drive space.)
1. Open a “shell”
A “shell” is a program that allows you to enter text-based commands through a command-line interface (or “CLI” for short). This is in contrast to a graphic user interface (or “GUI”) that you might be accustomed to; using a pointing device like a mouse or your finger to interact with graphic representations of data and actions to perform. (The term “shell” is a linguistic expansion on labeling an operating system’s core as its “kernel.” The shell “wraps” the kernel and is the user-facing surface that handles interactions with it.) For our purposes it’s unnecessary to become a shell expert, but if you’re curious to know more, this video is an excellent resource: Become a shell wizard in ~12 mins.
Open a shell in MacOS
- Press your keyboard’s ⌘ key and spacebar simultaneously to open the Spotlight prompt.
- Type
Terminal. - Press the Enter key.
This will open the macOS Terminal application. On macOS Ventura or later, Terminal defaults to Z Shell (zsh). On older versions of macOS, Terminal defaults to Bash Shell. (Either shell is perfectly usable.) You can check which shell you are using by typing (or pasting in) echo $SHELL and pressing your Enter key. This command reveals the file location of the shell program you are using, and the names within that location’s path will imply which shell is active. For example, if using Z Shell you might see the path /bin/zsh.
Open a shell in Linux
- Press your keyboard’s Ctrl, Alt, and T keys simultaneously to open the Terminal application. (This should work on Ubuntu, Linux Mint, Pop!_OS, and many GNOME-based Linux flavors.) The default shell is usually Bash.
Open a shell in Windows
- Press your keyboard’s Windows key.
- Type
PowerShellinto the prompt area. - Press the Enter key.
This will open the Windows PowerShell application.
2. Install UV
We need a clean way to install a new version of Python on our system, and to keep it separate from any existing (or future) installations of Python. In the past we may have recommended solutions like virtualenv or Conda. But these days the winning solution is UV, a single application that is blazingly fast and replaces (or wraps) several common Python-related tools and package managers such as pip.
The following installation instructions come from UV’s installation guide. For troubleshooting or additional details, refer to their documentation: https://docs.astral.sh/uv/getting-started/installation. See also, the UV GitHub repository.
Install UV on macOS or Linux
Enter the following command into your shell application: curl -LsSf https://astral.sh/uv/install.sh | sh
If you receive an error similar to “command not found: curl”, it could mean the your system does not have curl installed. Don’t worry. Give this wget command a try instead:
wget -qO- https://astral.sh/uv/install.sh | sh
Install UV on Windows
Enter the following command into your shell application: powershell -ExecutionPolicy ByPass -c "irm https://astral.sh/uv/install.ps1 | iex"
Make UV available
Congratulations. You now have UV installed on your system. But the uv command is not available in our current shell window. The easiest way to start using UV immediately is to close your current shell window and open a fresh new one. Give that a try now.
In a fresh shell window, enter the following to ask for the UV version number. This will confirm that the uv command is available to you.
uv --version
Your shell should respond with one line indicating the freshly installed version number. (Did something not go as planned? That’s ok. Refer to UV’s installation guide as a first step for troubleshooting.) For a full list of UV’s available commands, enter the following into your shell:
uv
That’s right, just asking for UV will provide you with a whole menu of commands and useful information.
3. Install Python
Using UV, we can now safely install a sandboxed Python, separate from any past or future installations of Python. To install the latest Python, enter the following into your shell:
uv python install
macOS command-line developer tools
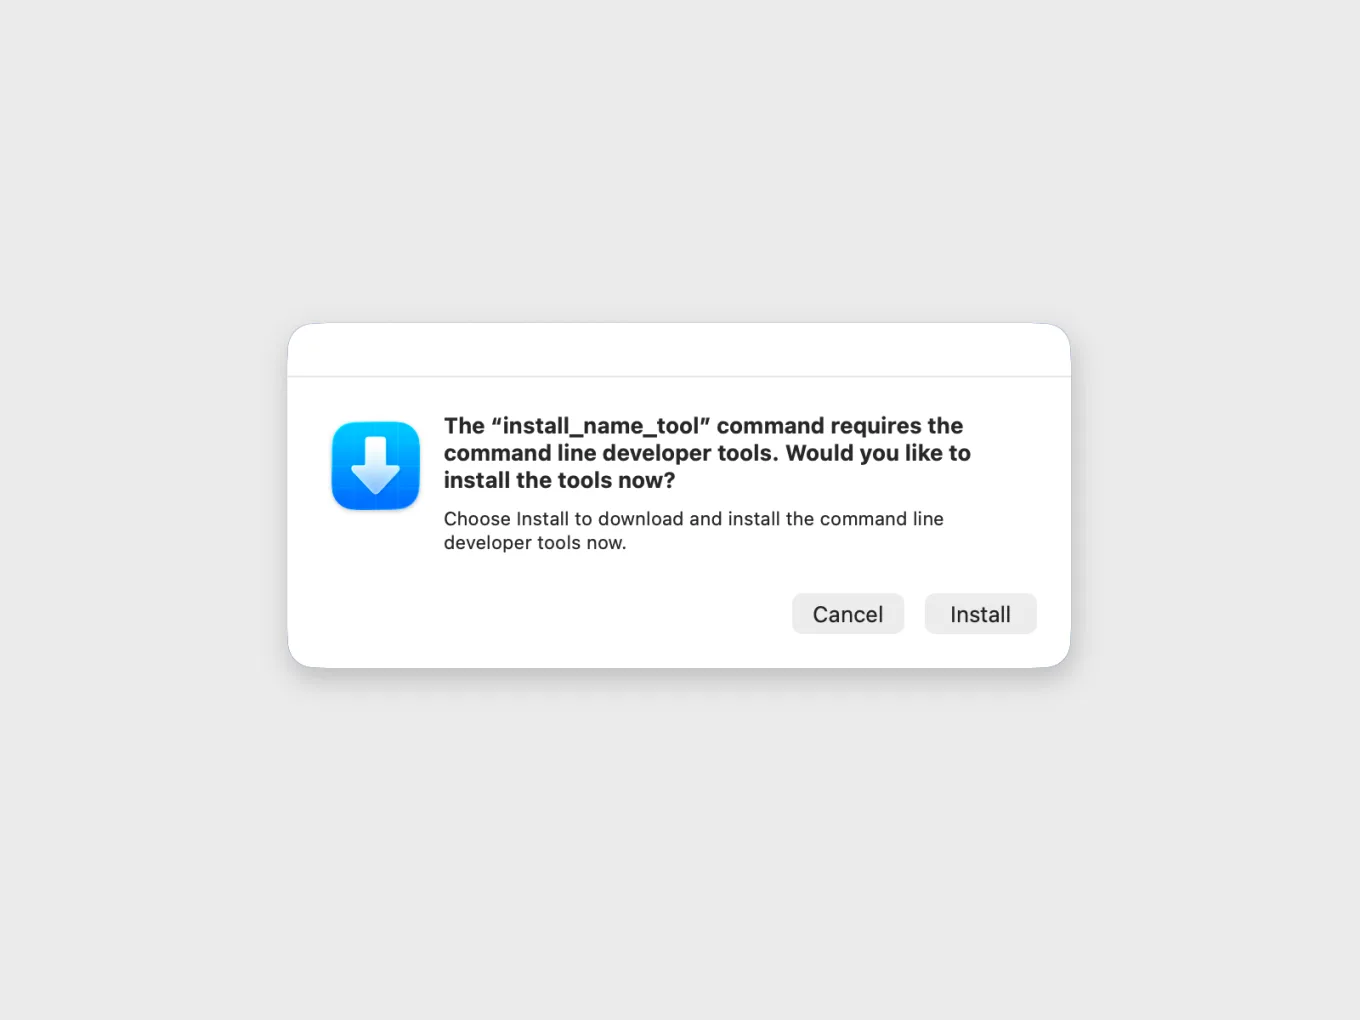
If you’re on macOS and have not previously installed the command-line developer tools, you will be prompted to do so now. It’s a hefty download, but will enable you to compile and run all of the tools you may wish to use in the future, including installing Python right now.
Confirm Python installed
Once UV has finished installing the latest version of Python, you can verify this (as well as detect previously installed versions of Python) by entering the following into your shell:
uv python list
UV can do a whole lot more than list some versions of Python. Here’s a handy cheat sheet for UV’s management commands: https://docs.astral.sh/uv/getting-started/features/
Hello, World!
Now that we definitely have Python installed, let’s run a tiny “Hello, World!” program right from the command line. Enter this into your shell:
uv run python -c 'print( "Hello, World!" )'
Our shell responds with “Hello, World!” (And we can deduce that the -c flag tells uv to execute any command that follows.) This is progress. But running one command at a time isn’t going to get us very far. Let’s start thinking a little larger.
4. Create your first project
We’d like to create a sandboxed environment that both “pins” a specific version of Python for use, and houses any additional code packages we require. This ensures that anything we add to Python remains tidily within our sandbox, and anything done outside of our sandbox is kept at a safe distance and won’t damage our project. Our UV project will be composed of:
- A folder.
- A
pyproject.tomlfile. - A local virtual environment (created automatically).
- Our Python files.
Create a project folder on your Desktop called qollab. (The exact name and location of this folder doesn’t matter so much, as long as it’s easy for you to get to and work with.)
To shell and back
As we build up our project, you will likely want to jump back and forth between your graphic user interface (like macOS Finder, Windows Explorer, etc.) and your shell program (like macOS Terminal, Windows PowerShell, etc). Here’s an easy guide for jumping between the two and always landing in the exact folder you need:
macOS: Finder and Terminal
To jump from Finder to Terminal while remaining in the same folder: 1. Within Finder, navigate to your intended folder. 2. Right-click inside the folder (or on the folder itself) to open a context menu. 3. Choose the “New Terminal at Folder” option.
(If you don’t see this option, go to your System Settings → Privacy & Security → Extensions → Finder → enable Terminal.) To jump from Terminal to Finder while remaining in the same folder: 1. Within Terminal, navigate to your intended folder. 2. Enter the following and press Enter. (Yes, include the empty space followed by a period. In this context the period is an alias for “here”, as in “open here.”)
open .
Linux: File Manager and Terminal
To jump from File Manager to Terminal while remaining in the same folder (Ubuntu, Fedora, Debian, Arch, Mint, etc.): 1. Within File Manager, navigate to your intended folder. 2. Right-click inside the folder to open a context menu. 3. Choose the “Open in Terminal” option.
To jump from Terminal to File Manager while remaining in the same folder: 1. Within Terminal, navigate to your intended folder. 2. Enter the following and press Enter. (Yes, include the empty space followed by a period. In this context the period is an alias for “here”, as in “open here.”)
xdg-open .
Windows: Explorer and PowerShell
To jump from File Explorer to PowerShell while remaining in the same folder: 1. Within File Explorer, navigate to your intended folder. 2. Click the address bar. 3. Type powershell and press Enter.
To jump from PowerShell to Explorer while remaining in the same folder:
- Within PowerShell, navigate to your intended folder.
- Enter the following and press Enter. (Yes, include the empty space followed by a period. In this context the period is an alias for “here”, as in “explore here.”)
explorer .
Initialize the project with UV
Now that we have a qollab project folder on our Desktop (and know how to jump between our graphic interface and a shell), open a shell to your project’s folder and enter the following command:
uv init
This little command packs quite a punch. It creates several files for us, some of which are hidden from view (in order to reduce clutter). Let’s have a look at the visible files first:
- pyproject.toml. This file specifies what version of Python our project ought to use, as well as any depencies we decide to include later. This a human-editable file, it’s yours to update.
- main.py. A minimal (yet executable) Python file that we can begin editing and build from. (We’ll run this file in just a moment!)
- README.md. An empty “Read me” Markdown file for documenting our project.
- uv.lock. In contrast to
pyproject.toml, this file is machine-generated and should not be manually edited. Whilepyproject.tomldecribes our intent,uv.lockis a detailed documentation of what packages and versions are actually in use.
The hidden files are also informative:
- .python-version. Just what it says on the tin: A file specifying the version of Python required.
- .gitignore. As part of our project’s initialization, UV automatically created a local git code repository for us, and included this handy list of files and file types to ignore in our commits.
- .venv. An entire folder dedicated to specifying and maintaining our project’s virtual environment. Leave this folder and its content alone.
Run our UV project
As UV was kind enough to generate a skeletal Python file for us, let’s take it for a test drive. Be sure that your shell is still within our project’s folder and enter the following:
uv run python main.py
Depending on what you named your project folder, your shell should respond with something similar to:
Hello from qollab!
5. Pick a text editor
It’s time to start writing your own Python code, and that means editing text files. Python code is just plain text, after all. That means your operating system’s built-in apps (like Text Edit or Notepad) are already enough to write and edit Python (provided you have rich text turned off, of course). But a robust code editing environment can actually make coding enjoyable through modern conveniences like syntax highlighting, auto-indentation, and more.
If you don’t already have a favorite text editor or Integrated Development Environment (IDE), now’s the time to discover one that’s right for you. While Wikipedia provides a comprehensive comparison of text editors, this more curated list of free, cross-platform coding apps will help you get started.
| Name | Friendliness | Description |
|---|---|---|
| VS Code | ✅ | Extension-driven code editor that balances approachability with serious IDE-level power. |
| Sublime | ✅ | Blazing-fast, minimalist editor famous for multi-cursor editing and near-instant responsiveness. |
| Kate | ✅ | Capable, lightweight KDE editor with strong syntax highlighting and project features without IDE heaviness. |
| Geany | ✅ | Small, simple IDE-style editor that offers compilation and tooling with minimal resource usage. |
| Emacs | 😅 | Deeply extensible, keyboard-centric editor that doubles as a programmable computing environment. |
| Vim | 😅 | Modal, terminal-native editor optimized for extreme speed and precision once its commands are mastered. |
Next steps
You can open a shell. You can bounce between your shell and GUI while staying within your project’s code folder. You’ve installed UV and Python. You’ve created a UV Python project and run some Python code. With a good text editor in hand, you’re ready to start making some really productive mistakes, an exciting start to your journey. You’re ready to venture on to more Qollab tutorials:
Stay in the loop.
Get the latest tutorials, demos, and project showcases straight to your inbox. No noise, just the good stuff.
On this page