Setup and simulate with IonQ
Create and leverage a free IonQ account to run an example quantum circuit on IonQ’s cloud simulator. Builds upon our previous tutorials for installing Python via UV, and installing IBM’s Qiskit SDK.
IonQ is a leading quantum hardware startup, developing general-purpose trapped ion quantum computers and accompanying software to generate, optimize, and execute quantum circuits. In this guide we will create an IonQ account, generate an IonQ API key, create a new Python project, install IonQ’s SDK (which is built upon IBM’s Qiskit), and run an example quantum circuit on IonQ’s cloud simulator. In order to follow along, it is essential that you have completed our previous guide for installing Python via UV, which also covers operating a shell command-line interface. For additional information on IonQ’s SDK, see IonQ’s Qiskit tutorial.
1. Create an IonQ account
Together, we are going to code a simple quantum circuit and execute it on IonQ’s cloud-based simulator. In order to connect to IonQ’s servers we must have authorization, and that comes in the form of an IonQ API key. To generate an API key, we must have an IonQ user account. Sign up for a new IonQ account by visiting https://cloud.ionq.com. Click on the “Get started for free” link. From there you can create your account using an email address and password combination.
Sign up for IonQ →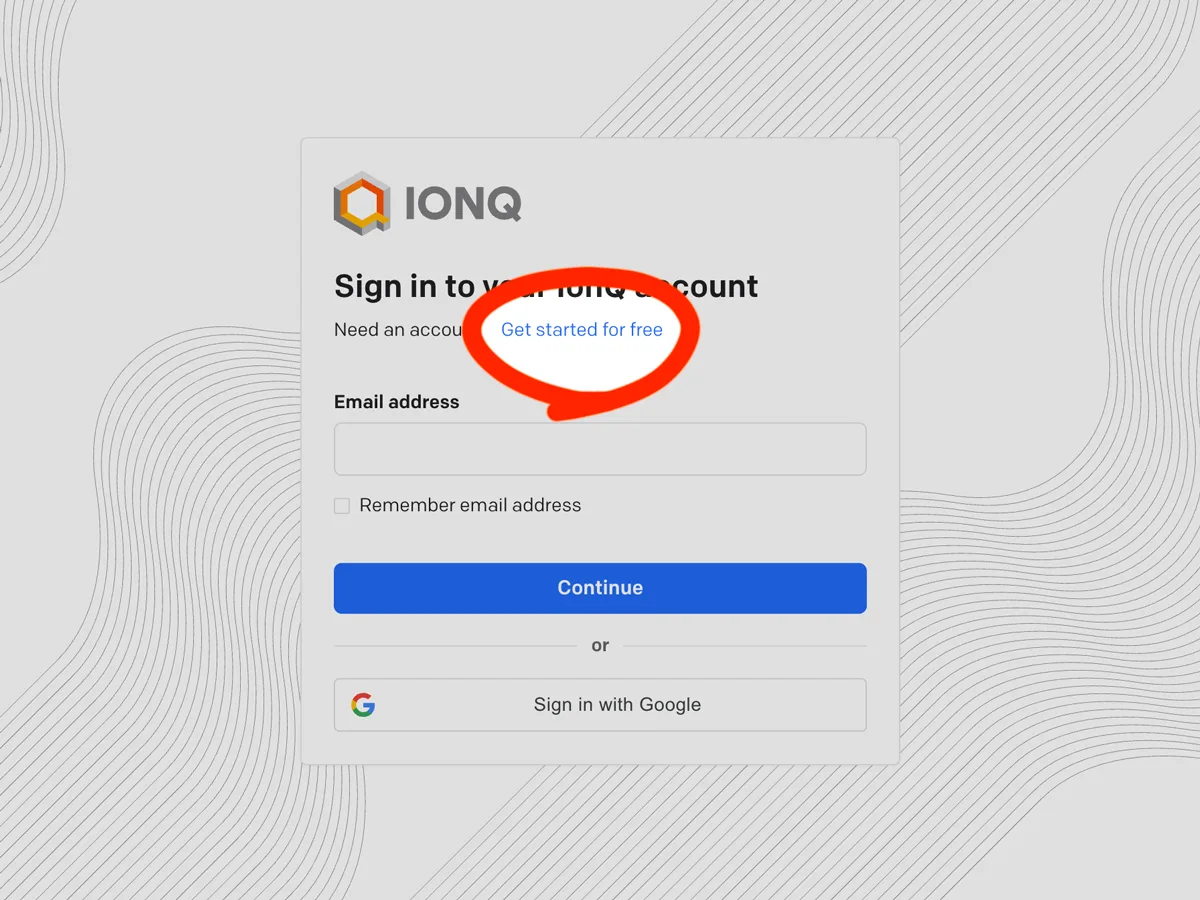
2. Generate an IonQ API key
Now that you have created an IonQ account, visit the “API Keys” tab of your account settings page: https://cloud.ionq.com/settings/keys. Log in if you are not presently signed in, then click on the “Generate key” button.
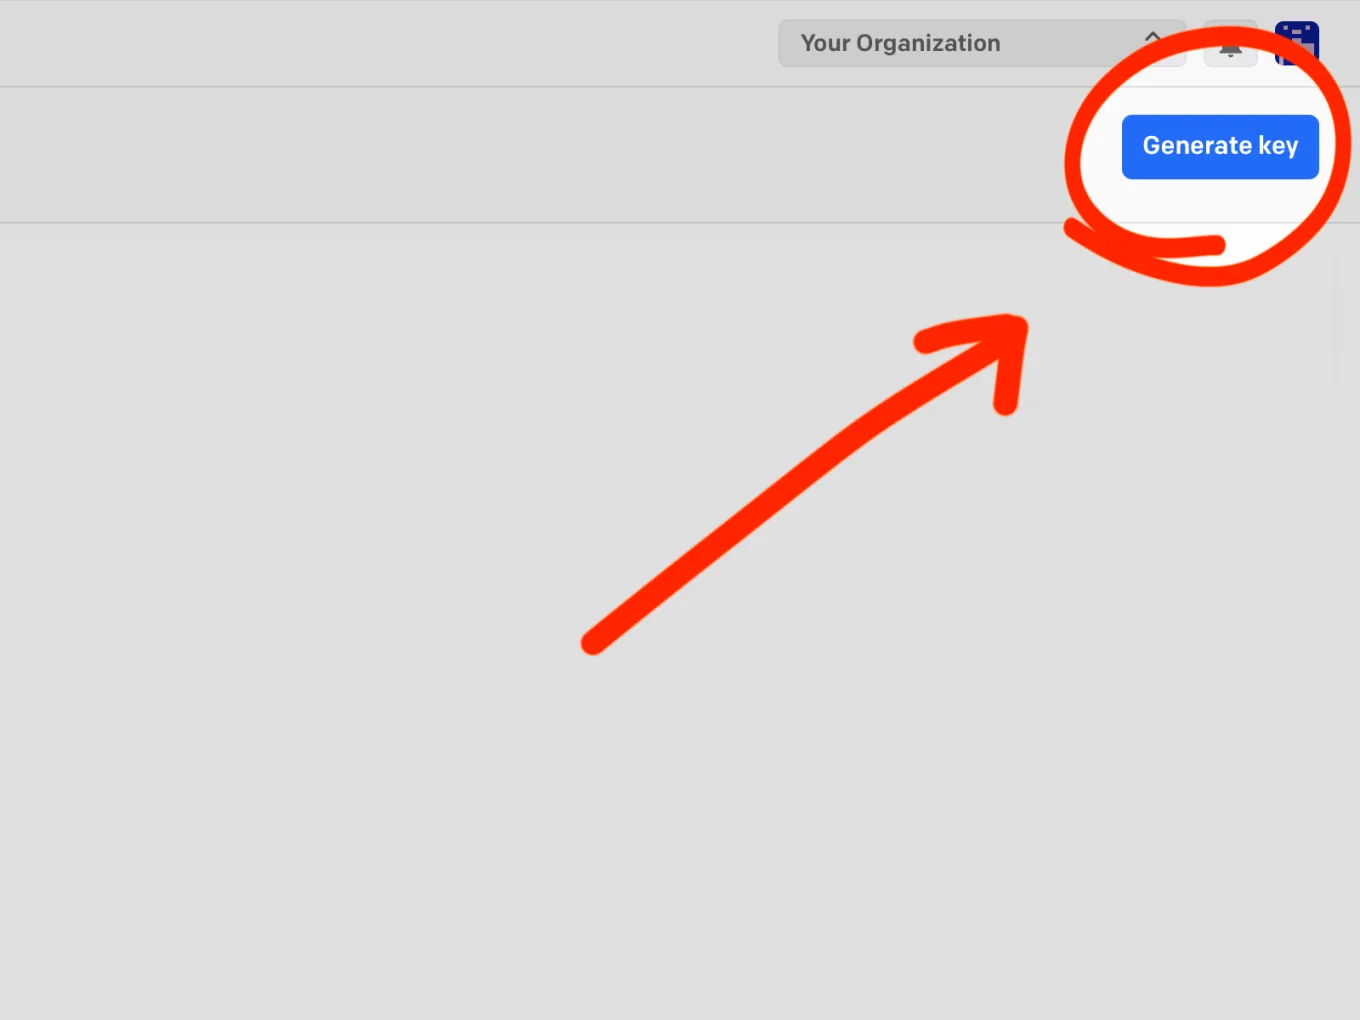
You will be prompted to provide a descriptive name for your key, and to choose an associated project. Note that using special characters in the description field may prevent the “Generate key” button from enabling itself. If you have not created any projects within your IonQ workspace, or have not been added to another account’s IonQ workspace project, you can always choose “Personal Workspace” as your key’s associated project.
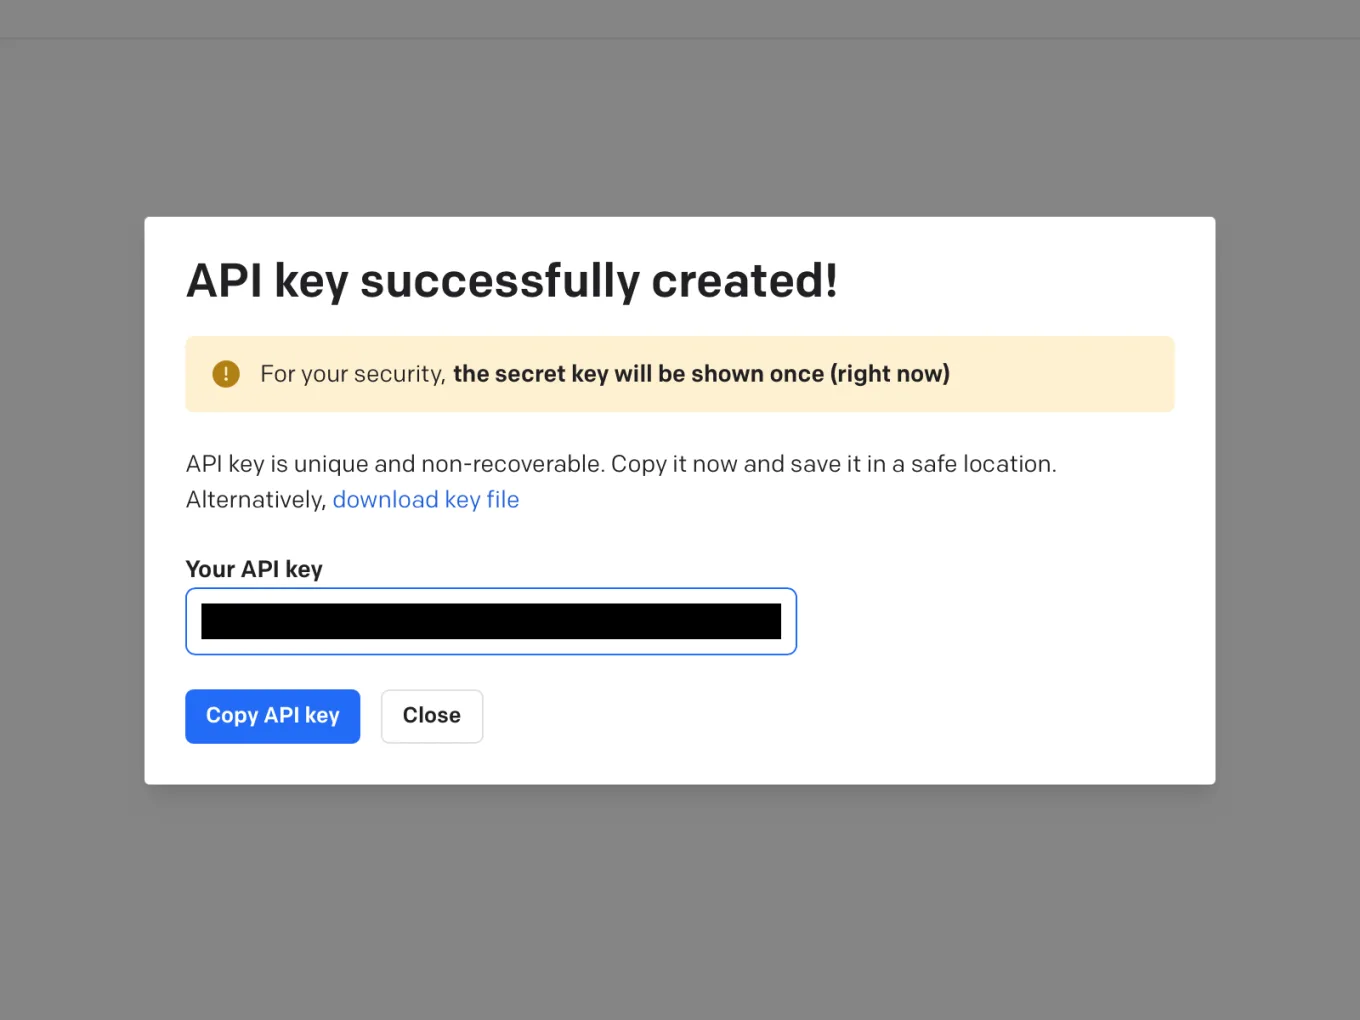
Caution: Your API key will only be revealed to you this once. Store it somewhere private and treat it as you would a regular password.
3. Create a new project
We’re going to create a new Python project that resides locally on our own machine and communicates with IonQ’s servers. If you have not already followed our guide to installing Python via UV, do that now, and then return to this step. That guide explains the easy installation process, and also provides some familiarity with entering basic commands into a shell command-line interface. (If you are currently a venv user, Conda user, or are accustomed to using unmanaged Python, we still strongly encourage you to switch to UV. Your future self will thank you.)
Create a new folder on your Desktop titled qollab-ionq. (The exact name and location of this folder doesn’t matter so much, as long as it’s easy for you to access and work with.) Open a new shell prompt. Be sure to navigate to inside your project’s folder, then enter the following command:
uv python install 3.12; uv python pin 3.12; uv init --app
This will ensure that a Qiskit-compatible version of Python is installed and that our project is “pinned” to this version. (As of this writing, January 2026, Python 3.12 is the latest release that is fully compatible with the Qiskit SDK core, its various add-on packages that we will use in upcoming tutorials, and IonQ’s SDK. If you are one of those folks that becomes itchy at the prospect of not using the absolute lastest version of Python, be our guest. UV makes it quick and easy to switch Python versions.) Finally, the init command initializes our app, creating several useful default files. If you experience trouble with this step, refer to our more detailed guide to installing Python via UV.
Install IonQ’s SDK
IonQ’s SDK is built upon IBM’s Qiskit, allowing us to take advantage of Qiskit’s flourishing ecosystem and IonQ’s unqiue quantum hardware. Enter the following command into our shell to install the latest versions of both IBM’s Qiskit SDK and IonQ’s SDK:
uv add qiskit qiskit-ionq
Once this process is complete you can enter the following command into our shell to perform an optional sanity check. If all’s gone well, our shell will respond with an IonQ SDK version number.
uv run python -c "import qiskit_ionq; print('IonQ SDK', qiskit_ionq.__version__)"
4. Handle your IonQ API key
In order to communicate with IonQ’s servers, our new Python project requires your IonQ API key. (Recall that your API key is akin to a password, and should be treated as such.) IonQ’s IonQProvider package will automatically look for an environment variable named IONQ_API_KEY, and we have a few options for safely providing this. (See also IonQ’s own guide to managing API keys.)
Set a key for this shell session
This is a quick, temporary solution that will make your API key available to our current shell session. (That means if we close our current shell and open a new one, or execute our Python script from within a different shell session than the one we’ve set your key in, your key value won’t be available to the Python script.) On macOS or Linux, enter the following into our shell:
export IONQ_API_KEY="your_real_key_here"
Or on Windows, enter the following into PowerShell:
$Env:IONQ_API_KEY=="your_real_key_here"
Confirm your key is present
Regardless of whether we set your key only for this current shell session, or for every shell session that your user profile initiates, your key must be present in order to be read by IonQ’s IonQProvider package. We can confirm its presence on macOS or Linux by entering the following into our shell:
echo $IONQ_API_KEY
Or on Windows, enter the following into PowerShell:
echo $Env:IONQ_API_KEY
Our shell should respond with your IonQ API key.
Confirm that your key is functional
Just because IONQ_API_KEY is available in our environment and contains a value doesn’t necessarily mean we’re authorized to access IonQ’s servers. Enter the following into our shell to confirm that we have access to various IonQ backends:
uv run python -c "from qiskit_ionq import IonQProvider; p=IonQProvider(); print([b.name for b in p.backends()])"
Our shell should respond with a list of backends available to your account. Regardless of whether your account is on a free tier or paid tier, you should see a simulator profile in this list. If your account in on a paid tier you might also see available hardware profiles. (A free tier account may see a single generic hardware profile that serves as a placeholder, but you will be unable to send jobs to any actual quantum hardware.) If your key is missing or invalid then you will receive an authorization error rather than a list of backend profiles.
Include your key in our project
We’ve entered your key into our shell’s environment and confirmed that it functions. But what about the next time we open a new shell window? Wouldn’t it be easier if going forward our project always had access to your API key? We can accomplish this by creating a hidden “environment file” for our project that will seed our shell environment with your API key (and whatever other variables we may wish to set). Create a .env file inside of our project’s folder, add the following line, and save the file:
export IONQ_API_KEY="your_real_key_here"
On macOS or Linux, when we’re ready to use this key we would enter the following into our shell to load our environment file and run a Python script.
set -a; source ./.env; set +a; uv run python our-future-script.py
Or in Windows PowerShell we would do the following:
Get-Content .env | ForEach-Object { if ($_ -match '^\s*([^#=]+?)\s*=\s*(.*)\s*$') { Set-Item -Path "Env:$($matches[1])" -Value $matches[2] }}
uv run python our-future-script.py
Protect your API key
Perhaps our project is part of a shared code repository. The last thing we want is to accidentally publish your private API key along with the codebase. In that case, add .env to our .gitignore list. (If the .gitignore does not exist within our project folder, create it, enter the text .env on a single line, and save it.) As a courtesy to our teammates and future selves, also create an example environment file that serves as a reminder and template for what information must be provided in order for the project to function. Name this file .env.example and include the following line in it:
IONQ_API_KEY=
Now our teammates (or future us) can simply copy this file from .env.example to .env and fill in the appropriate information locally. (This is a standard “don’t leak tokens” pattern.)
5. Update our transpile settings
There’s always a gap between the theoretical and the actual, between the clear expression of intent and the dirty business of actually making something function. When we code a quantum circuit, more often than not we are creating idealistically. Part of Qiskit’s magic is that it transforms our quantum circuit design in two ways: It reconfigures our gates for IBM’s specific quantum hardware architecture, and also optimizes our algorithms for maximum efficiency, also based on IBM’s available hardware. This optimization process can reduce register depth, merge gates, and change the overall circuit structure while preserving its semantics. The process of compiling code for one model, then translating that compilation to function on a different model, is called transpiling.
The twist with our scenario is that we are not using IBM’s architecture to execute our quantum circuit. We are instead using’s IonQ’s architecture. IonQ’s SDK has its own methods for translating and optimizing our circuit designs, based on its own unique quantum hardware. We want IonQ to have direct access to our original circuit design, not a version that has been “optimized” for some other architecture. (That would be like working from a lossy copy when we have access to the original right in front of us.) In order to hand IonQ’s SDK our original, unaltered circuit design, we must tell Qiskit to only make minimal, necessary changes.
Qiskit’s transpile levels
The following table describes each of Qiskit’s transpile levels, its general approach to optimization, and what it’s best suited for. We’re most interested in creating “early experiments” and “transpiling at scale”, and will opt for an optimization level of 1.
| Level | Optimization | Best suited for |
|---|---|---|
| 0 | None | Hardware-native backends (IonQ, neutral atoms), learning, debugging, preserving algorithm structure. |
| 1 | Light | Early experiments, hardware with mild noise, transpiling at scale. |
| 2 | Medium | General IBM hardware usage, balanced workflows. |
| 3 | Heavy | Final production runs on noisy IBM devices. |
To ensure that all of our future IonQ circuits run as expected, we can edit Qiskit’s user configuration file. The Qiskit installation process creates a hidden .qiskit folder within your home folder. We need to create (or edit) a settings.conf file within that folder. On macOS or Linux that location should be:
~/.qiskit/settings.conf
On Windows that location should be:
$HOME\.qiskit\settings.conf
Open (or create) that settings.conf file, add the following two lines of code, then save the file:
[default]
transpile_optimization_level = 1
This will prevent Qiskit from making aggressive rewrites to our circuit design, handing it off cleanly to IonQ’s own transpiler. (It will also prevent a warning from IonQ’s SDK when we run our quantum circuit just a bit further down in this tutorial.) For additional information, see IonQ’s article “Compilation and native gates with Qiskit.”
6. Run your circuit on IonQ’s cloud simulator
With our UV-initiated project folder, and IonQ API key in place, we’re ready to use IonQ’s quantum simulator. Create a new blank file within your project folder named ionq-simulator.py, open it with your source code editor, paste the following code into it, and save the file:
from qiskit import QuantumCircuit
from qiskit_ionq import IonQProvider

qc = QuantumCircuit( 2, name="Bell state on IonQ simulator" )
qc.h( 0 )
qc.cx( 0, 1 )
qc.measure_all()

provider = IonQProvider()
backend  = provider.get_backend( "simulator" )
job = backend.run( qc, shots=1000 )
print( job.get_counts() )
Our first IonQ Bell state
Before we run our short Python script above, let’s break down what it intends to accomplish. First, we import Qiskit’s tools for describing quantum circuits. Then we import IonQ’s interface for talking to various resources for executing quantum circuits. These two imports are all we need to begin our circuit building journey.
The command QuantumCircuit( 2, … ) creates a quantum circuit composed of two qubit registers, both initialized to a | 0 ⟩ (“ket zero”) state. (Need a refresher on qubits and ket notation? See our guide to qubits.) We use the command qc.h( 0 ) to place a Hadamard gate onto register 0, flipping that qubit into superposition. Next, we use the command qc.cx( 0, 1 ) to place a CNOT gate across the two registers, using register 0 as the control qubit and register 1 as the target qubit. This creates a Bell state, distributing register 0’s superposition across the two qubits, entangling them.
Finally, we use qc.measure_all() to measure both qubit registers, collapsing the distributed superposition into a definitive value. The two possible measured values are | 00 ⟩ and | 11 ⟩ , each with a 50% probabilty of occurrence. This simulation is run 1,000 times (shots=1000) and the results of these “shots” are output to our shell. While it is extremely unlikely that your result will divide into exactly 500 of each value, it should arrive reasonably close.
Now that we have a better idea of what our script does, let’s execute it. On macOS or Linux, enter the following into our shell to load our environment variables and execute our script:
set -a; source ./.env; set +a; uv run python ionq-simulator.py
Or in Windows PowerShell enter the following:
Get-Content .env | ForEach-Object { if ($_ -match '^\s*([^#=]+?)\s*=\s*(.*)\s*$') { Set-Item -Path "Env:$($matches[1])" -Value $matches[2] }}
uv run python ionq-simulator.py
Take a patient breath as IonQ’s cloud simulator processes our circuit. In a few moments we should receive results similar to the following:
{'00': 492, '11': 508}
Optional: Use IonQ’s “noisy simulator”
In addition to its basic simulator, IonQ provides “noise models” that produce results closer to that of actual quantum hardware. Insert the highlighted line of code below into your existing ionq-simulator.py as indicated to use IonQ’s aria-1 noise model in your simulations:
provider = IonQProvider()
backend  = provider.get_backend( "simulator" )
backend.set_options( noise_model="aria-1" )job = backend.run( qc, shots=1000 )
print( job.get_counts() )
Next steps
We’ve created an IonQ account, generated an IonQ API key, created a new Python project, installed IonQ’s SDK, and run an example quantum circuit on IonQ’s cloud simulator. (That’s not a bad run for today!) Our next goal is to run quantum circuits on IonQ’s actual quantum hardware. Keep in mind that this will require a paid tier account and some patience. We must create a support request for accessing IonQ’s QPUs, and wait for that request to be honored. Then once we do have access we must be mindful that QPU jobs are queued for execution and our circuits may need to wait several hours behind previously queued jobs before it’s our turn. When you’re ready to take your quantum journey to the next level join us on the hardware side!
Stay in the loop.
Get the latest tutorials, demos, and project showcases straight to your inbox. No noise, just the good stuff.
On this page