Create a Project on Qollab
How project creation works on Qollab now: one short dialog to name your work, then a live project page where you write it up, add your code, and publish when you are ready.
This guide assumes that you have already created a free Qollab account, chosen a username, and are currently signed into the platform. If any of that sounds unfamiliar, don't fret, sign in or sign up here first, then come back to start flexing your quantum muscles.
Starting a new project
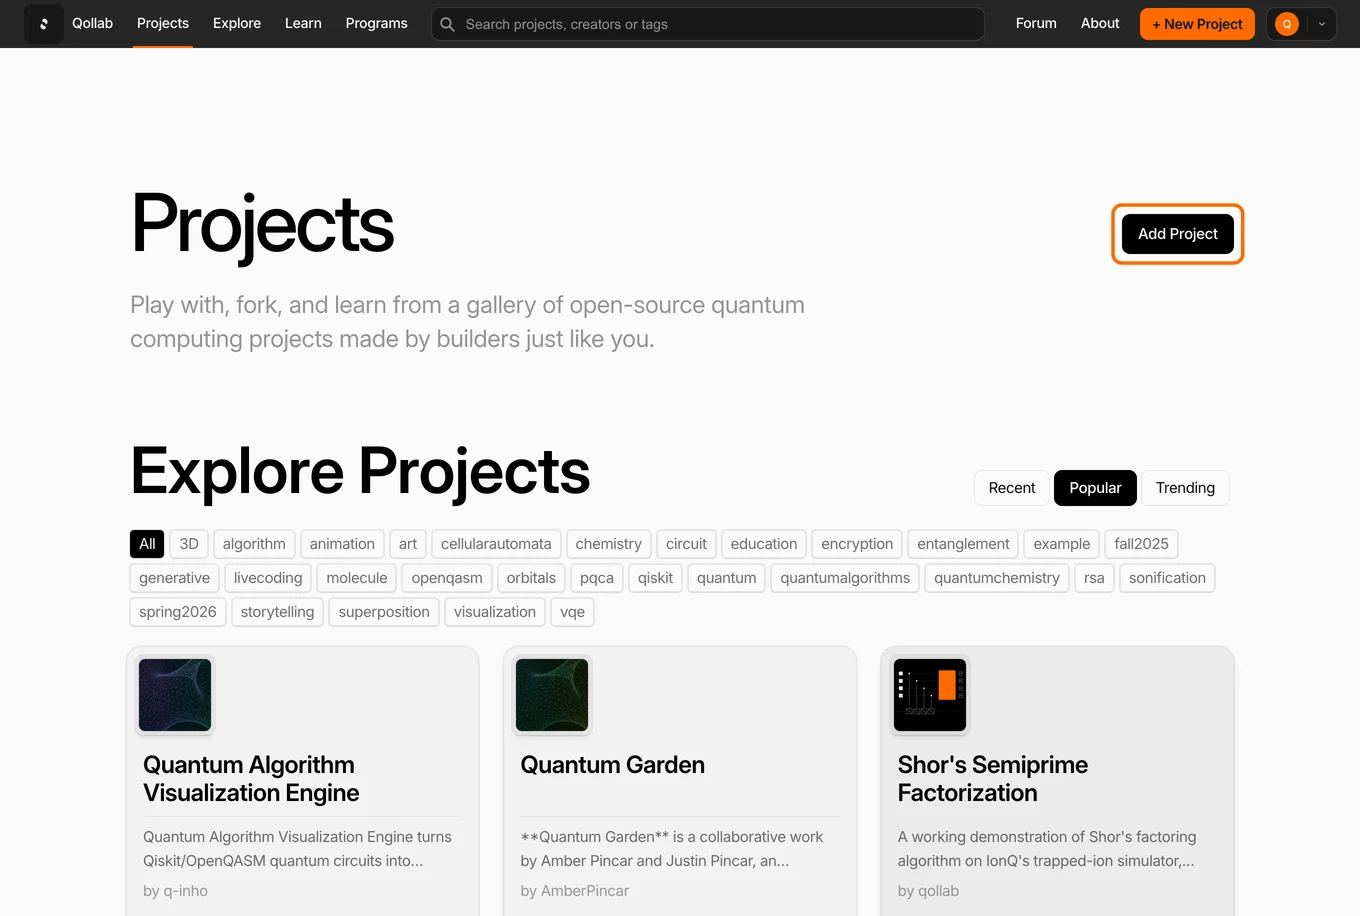
Click the Add Project button on the Projects page. The same New Project action lives in the top navigation and in your account menu. Each one opens the create dialog right where you are, so nothing takes you off the page you were on.
Name your project
The create dialog asks for two things to get started, and both are required.
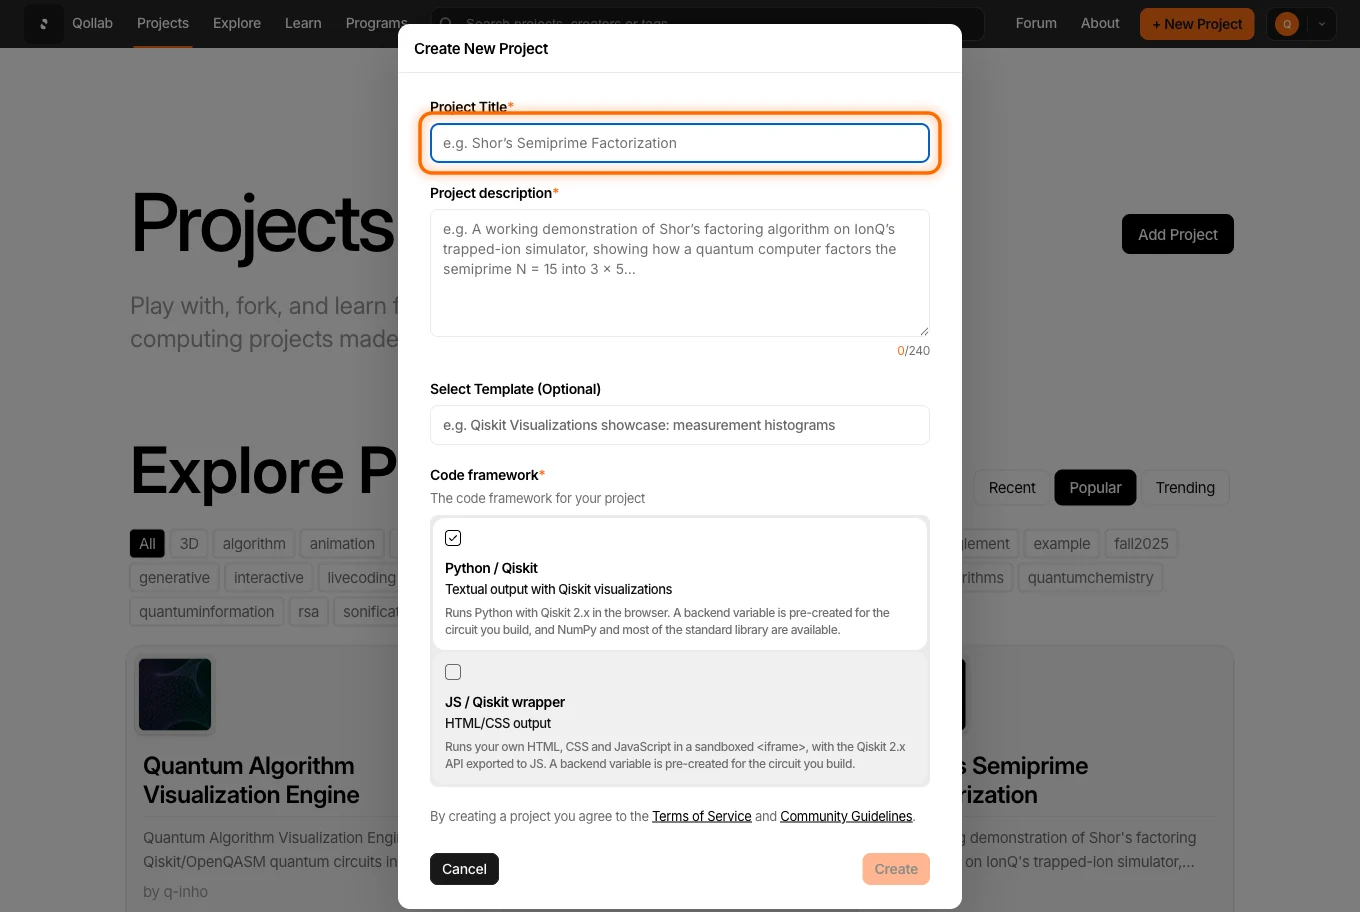
- Project Title: A concise, descriptive name, for example Quantum Teleportation Visualizer. Qollab turns this into your project's web address automatically, so there is no separate URL field to fill in. If the name is already taken, a number is added to keep the address unique. You can rename a project later from its settings.
- Description: A short summary of what your project does, up to 240 characters, with a live counter as you type. This is the preview card people see when they browse, so it is worth a sentence that reads well on its own.
Two more choices sit below, and you can leave both on their defaults:
- Start from a template (optional): Pick an existing project to begin from, and Qollab copies its code and setup into yours as a starting point. Leave it empty to start from a blank Qiskit script.
- Code framework: Choose Python / Qiskit (the default) or the JavaScript / Qiskit wrapper. Each card has an ⓘ tooltip explaining the difference. If you started from a template, this follows the template's framework.
Press Create, and Qollab opens your new project, ready to fill in.
Filling in your project
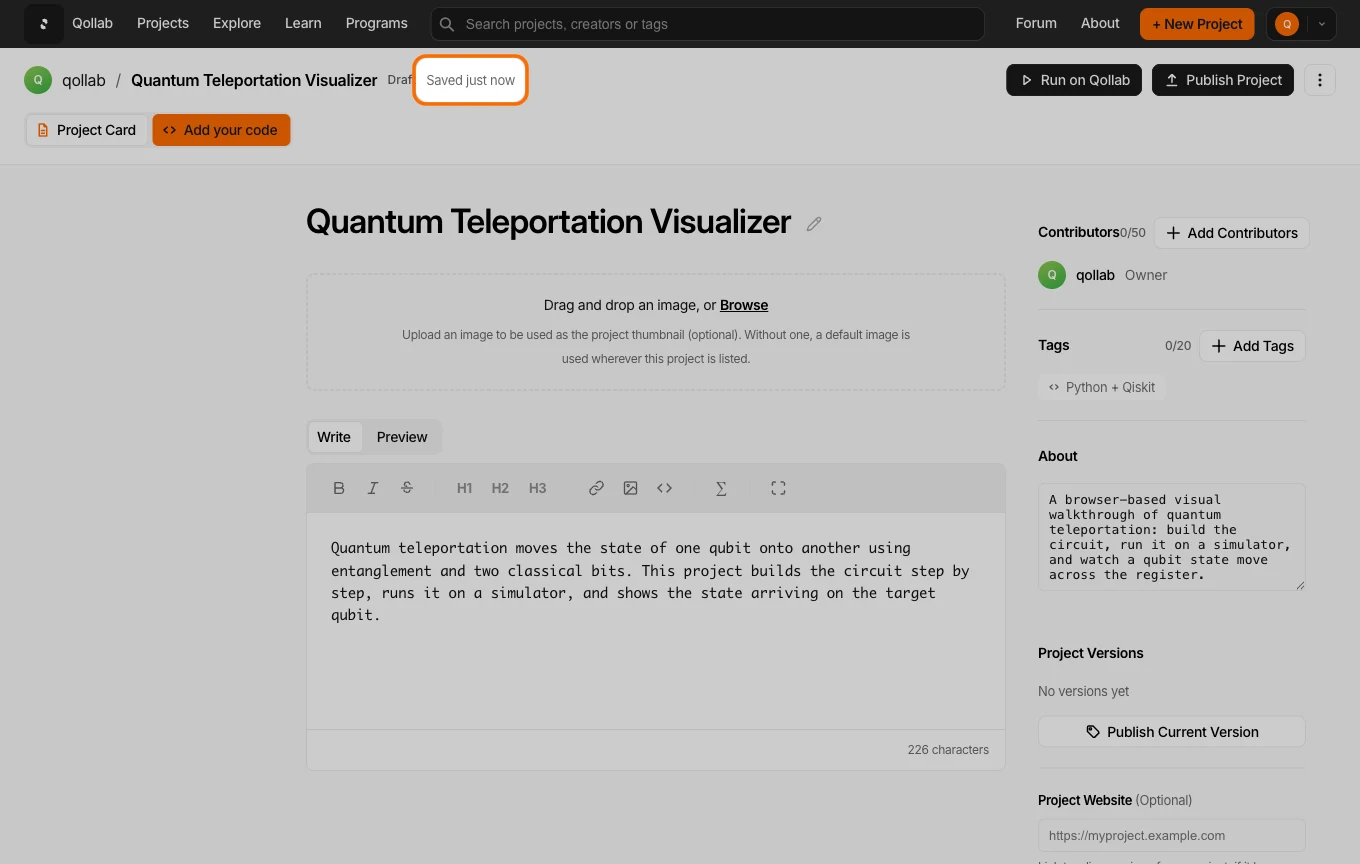
Your project opens as a draft, already in edit mode, on its own page. Everything the old creation wizard walked through step by step now lives here on the page itself, organized into tabs, so you can work on any part in any order.
The Project Card tab
This is where you explain the why and how behind your work: your goals, your approach, and your results, so others can learn from your experience. Write your explanation in Markdown, preview it before publishing, and add math notation for the equations quantum write-ups usually need. The same tab holds an optional thumbnail image, the picture that represents your project wherever it is listed. It is also home to your Tags (topics like qiskit, ionq, or entanglement that help the community find your work), your contributors, and links to a Git repository or a project website.
The Code tab
The Code tab is where your quantum scripts live. Qollab preloads the editor with a simple Python starter using Qiskit, a two-qubit Bell state circuit, so you have a foundation to build from. Replace it with your own code or build on top of it, and pick where it runs from the QPU selector on this tab.
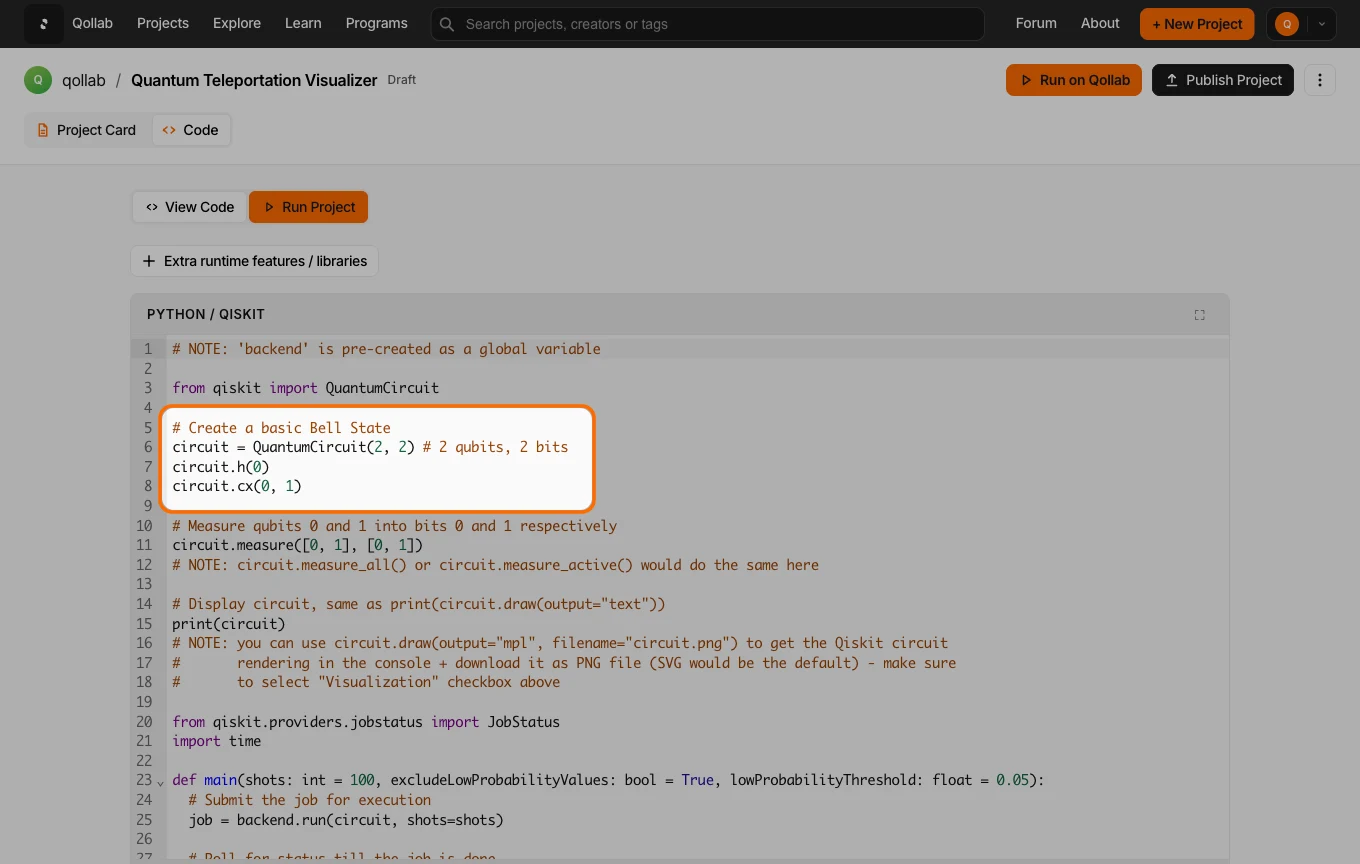
from qiskit import QuantumCircuit
from qiskit.quantum_info import Statevector

# Create a 2-qubit circuit
qc = QuantumCircuit(2)

# Apply gates
qc.h(0)  # Hadamard gate on qubit 0
qc.cx(0, 1)  # CNOT gate (creates entanglement)

# Display the circuit
print(qc)
There is no Save button. Your work saves on its own as you go, and a status line in the header confirms it, so you can move between tabs or step away without losing anything.
Publishing
Your draft is private while you work on it. When it is ready to share, click Publish. There is no separate dialog: the Draft label clears, your project becomes publicly reachable, and this first release is tagged v1.0. Publishing confirms your work follows the Community Guidelines.

After it is live, any further edits save as a draft on top, and the header offers to publish those changes when you want them public. Your published version stays exactly as it is until you choose to update it.
We look forward to seeing what you will build and share with the community!
Stay in the loop.
Get the latest tutorials, demos, and project showcases straight to your inbox. No noise, just the good stuff.